Getting started
After setting up the required software for Linux. It is time to connect to the robot and test the whole setup by using FCI to read the current robot state.
Operating the robot
Before going further though, here are a few safety considerations. Always check the following things before powering on the robot:
Make sure that the Arm has been mounted on a stable base and cannot topple over, even when performing fast motions or abrupt stops.
Caution
Only tabletop mounting is supported, i.e. the Arm must be mounted perpendicular to the ground! Other mountings will void your warranty and might cause damage to the robot!
Ensure that the cable connecting Arm and Control is firmly attached on both sides.
Connect the external activation device to Arm’s base and keep it next to you in order to be able to stop the robot at any time.
Hint
Activating the external activation device will disconnect the Arm from Control. The joint motor controllers will then hold their current position. The external activation device is not an emergency stop!
This list is non-exhaustive! The manual delivered with your robot contains a chapter dedicated to safety. Please read it carefully and follow the instructions. The manual can also be found in our Franka World Hub.
Important
The workstation PC which commands your robot using the FCI must always be connected to the LAN port of Control (shop floor network) and not to the LAN port of the Arm (robot network).
Installing the FCI Feature
In order to be able to operate the robot through the Franka Control Interface, the corresponding Feature needs to be installed on your device. If it is already installed to the controller, it will be listed under Desk –> Settings –> System –> Installed Features. If FCI is not installed yet, you can synchronize it from your Franka World account to your controller. Therefore, you must have an available FCI license in your company/university account and have your controller registered in this account. The software (offline or online) synchronization process is described in more detail in the Franka World user manual.
Setting up the network
Good network performance is crucial when controlling the robot using FCI. Therefore it is strongly recommended to use a direct connection between the workstation PC and Panda’s Control. This section describes how to configure your network for this use case.
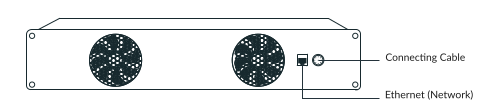
Use Control’s LAN port when controlling the robot through FCI. Do not connect to the port in Arm’s base.
The Control and your workstation must be configured to appear on the same network. Simplest way to achieve that is to use static IP addresses. Any two addresses on the same network would work, but the following values will be used for the purpose of this tutorial:
Workstation PC |
Control |
|
|---|---|---|
Address |
172.16.0.1 |
172.16.0.2 |
Netmask |
24 |
24 |
The Control’s address (172.16.0.2) is called <fci-ip> in the following chapters.
Hint
With this network configuration, Desk can be accessed via https://<fci-ip>, although
you will see a certificate warning in your browser.
The configuration process consists of two steps:
Configuring Control’s network settings.
Configuring your workstation’s network settings.
Control network configuration
For this step, the robot needs to be installed and tested. Please read through the documents shipped with your robot and follow the setup instructions before continuing any further!
With system version >= 5.5.0, the Control’s network can be configured in the settings interface. For the duration of this step you can connect to the robot through the port in the robot’s base. For details, consult the Connecting a user interface device section in the manual delivered with your robot.

Accessing the Franka’s settings interface through Desk.
To set up a static address, enter the following values in the Network section:
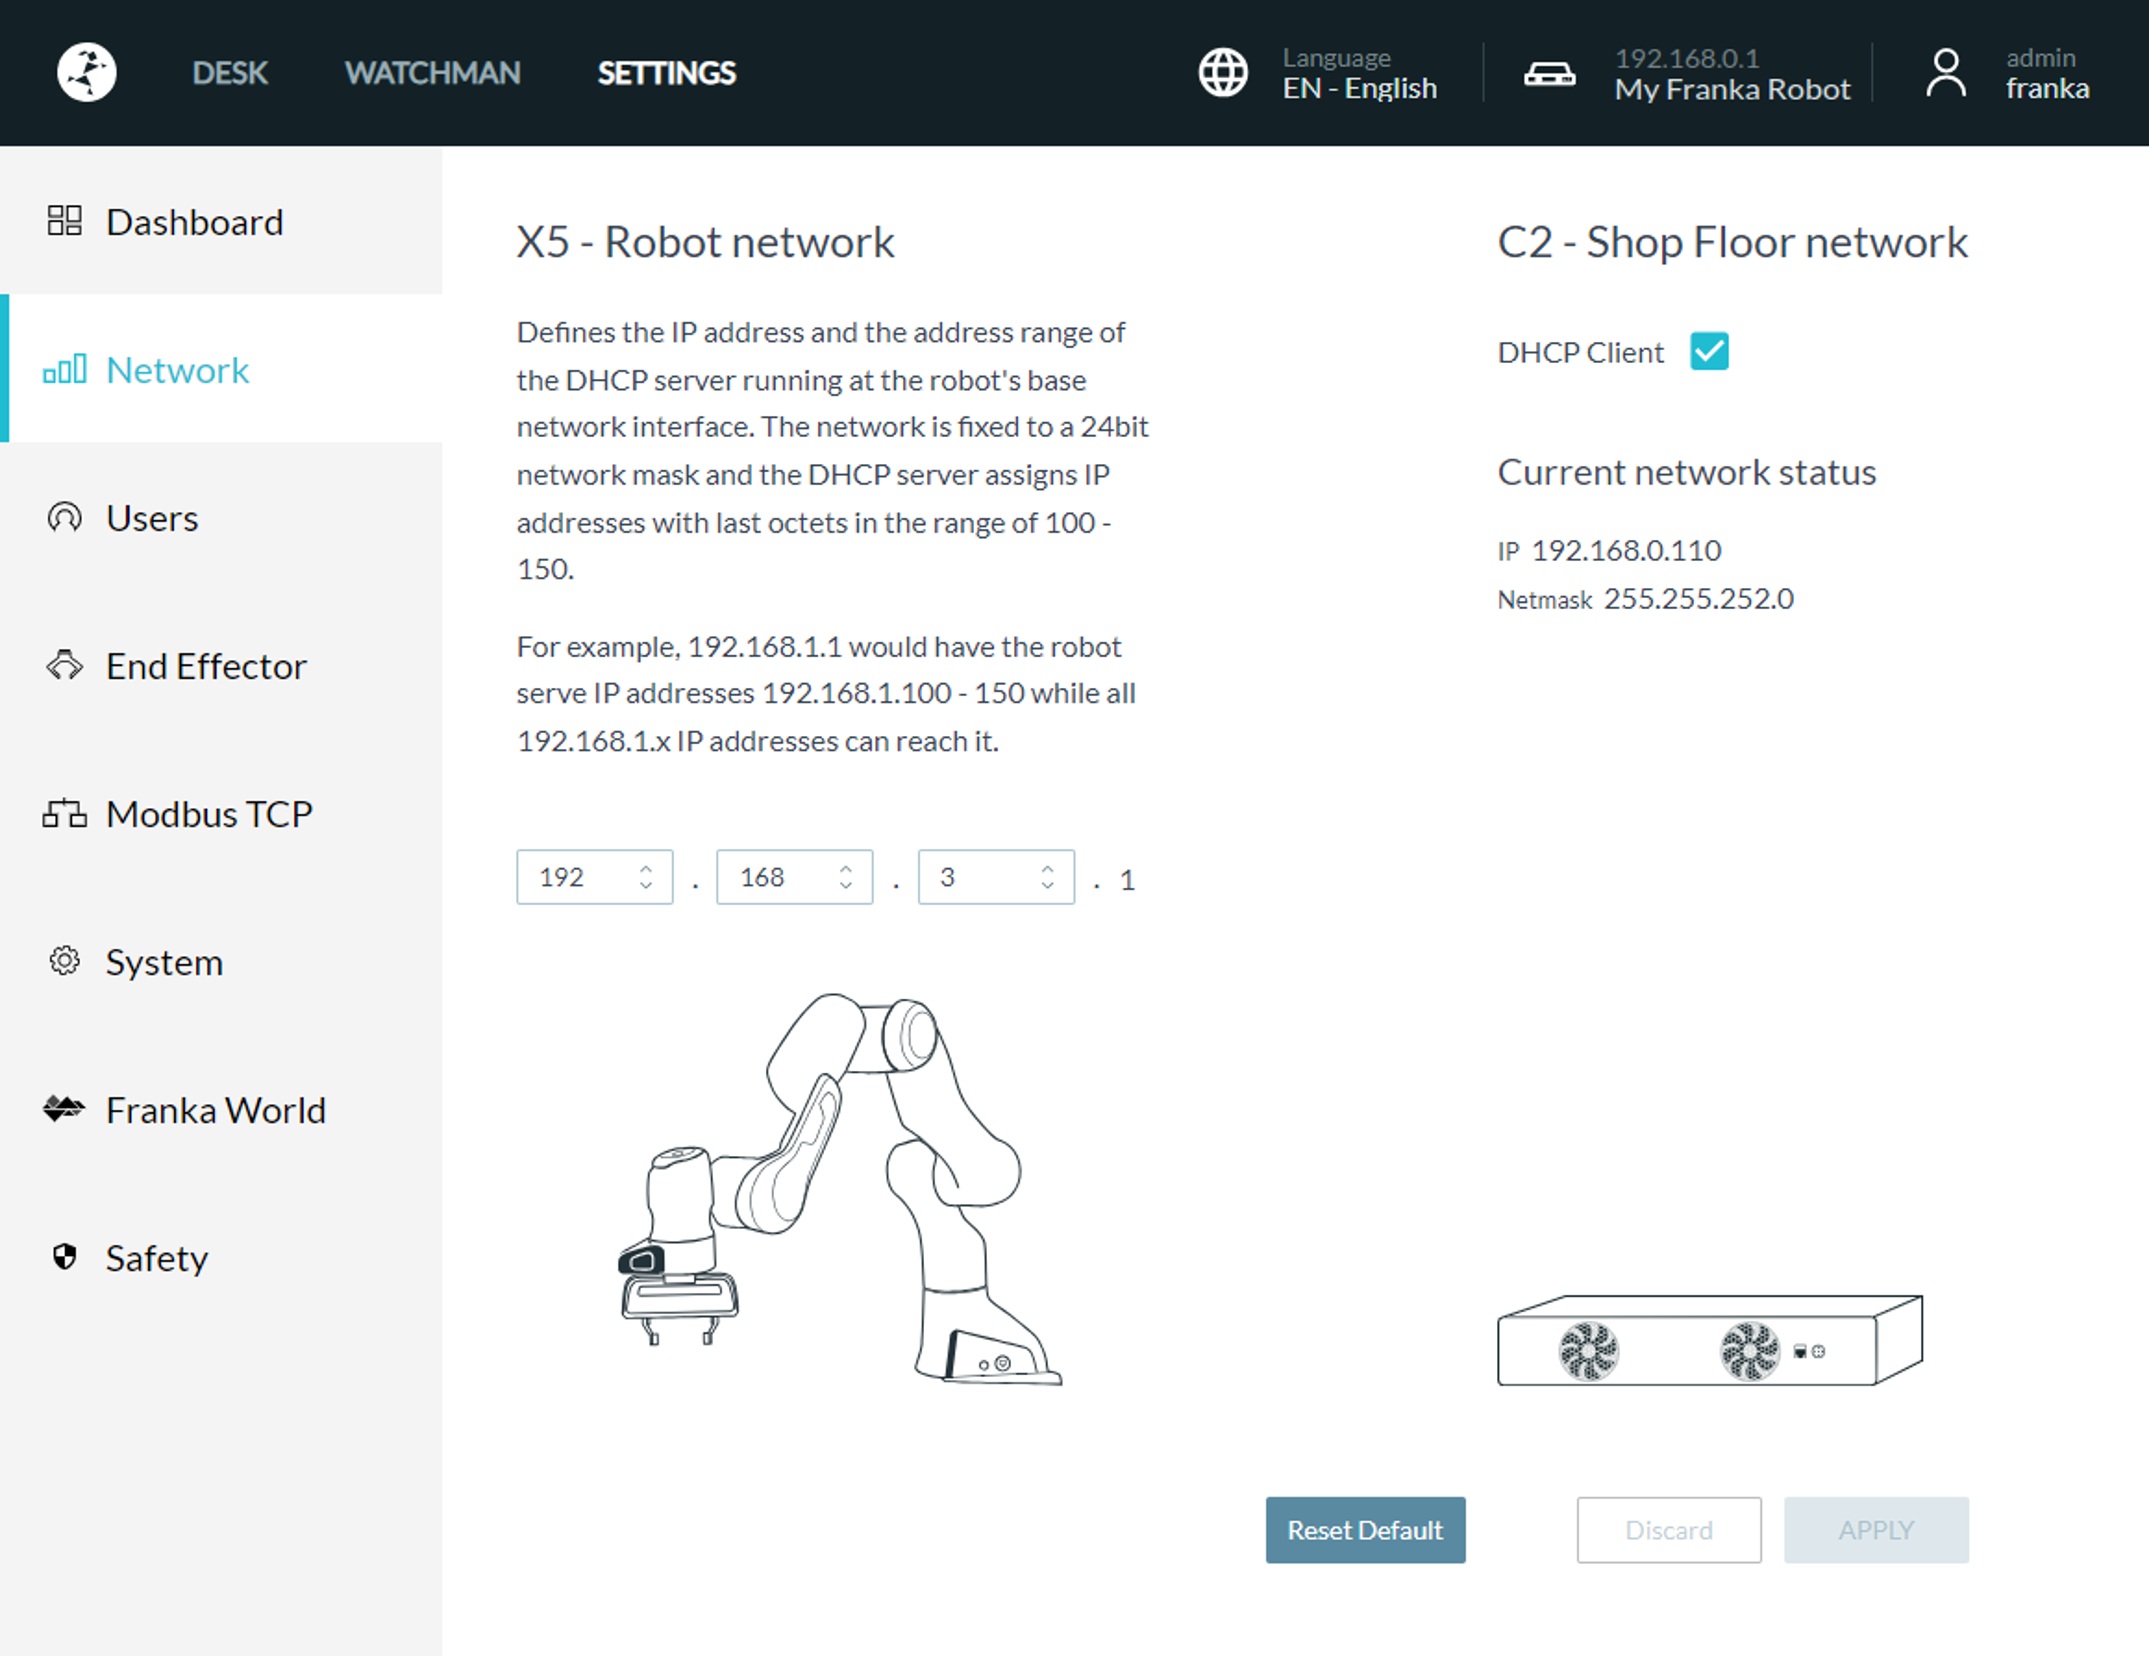
Setting a static IP for the Control’s LAN port (Shop Floor network). DHCP Client option is deselected.
Press Apply. After the settings are successfully applied, connect your workstation’s LAN port to the robot’s control unit.
Linux workstation network configuration
This section describes how to set up a static IP address on Ubuntu 16.04 using the GUI. Follow the official Ubuntu guide if you prefer to use the command line.
Caution
The following steps will modify your network settings. If in doubt, contact your network’s administrator.
First, go to Network Connection widget. Select the wired connection you will be using and click edit.
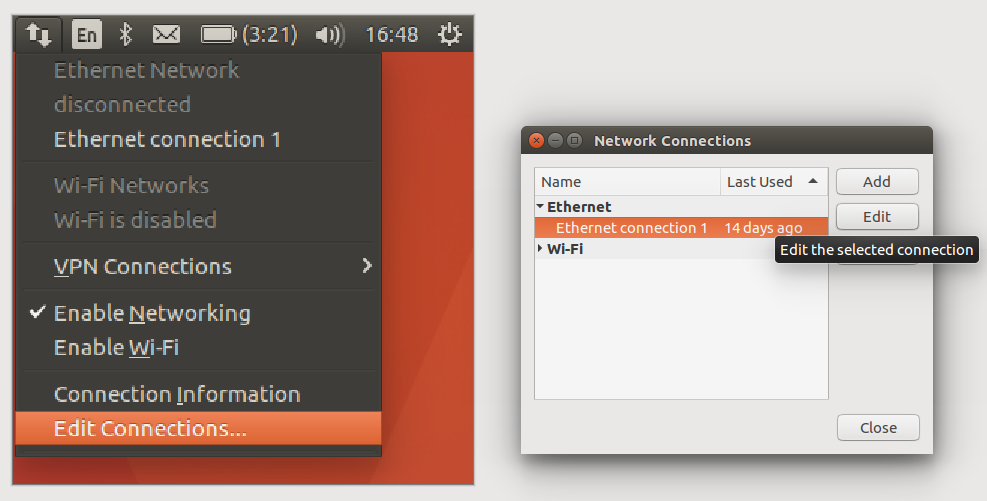
Edit the connection in the Ethernet section.
Next, click on the IPv4 settings tab, set the method to Manual, and enter the following values:

Setting a static IP for the Workstation PC. Method is set to Manual.
Hint
This step will disable DHCP, which means you will no longer obtain an address when connecting to a DHCP server, like the one in Arm’s base. When you no longer use FCI, you can change the Method back to Automatic (DHCP).
Save the changes, and close the Network Connection window. Click on the connection name from the drop down menu. It should now be possible to connect to the robot from your workstation. To verify this, perform the Network bandwidth, delay and jitter test. From now on, you can also access Desk through this address in your browser.
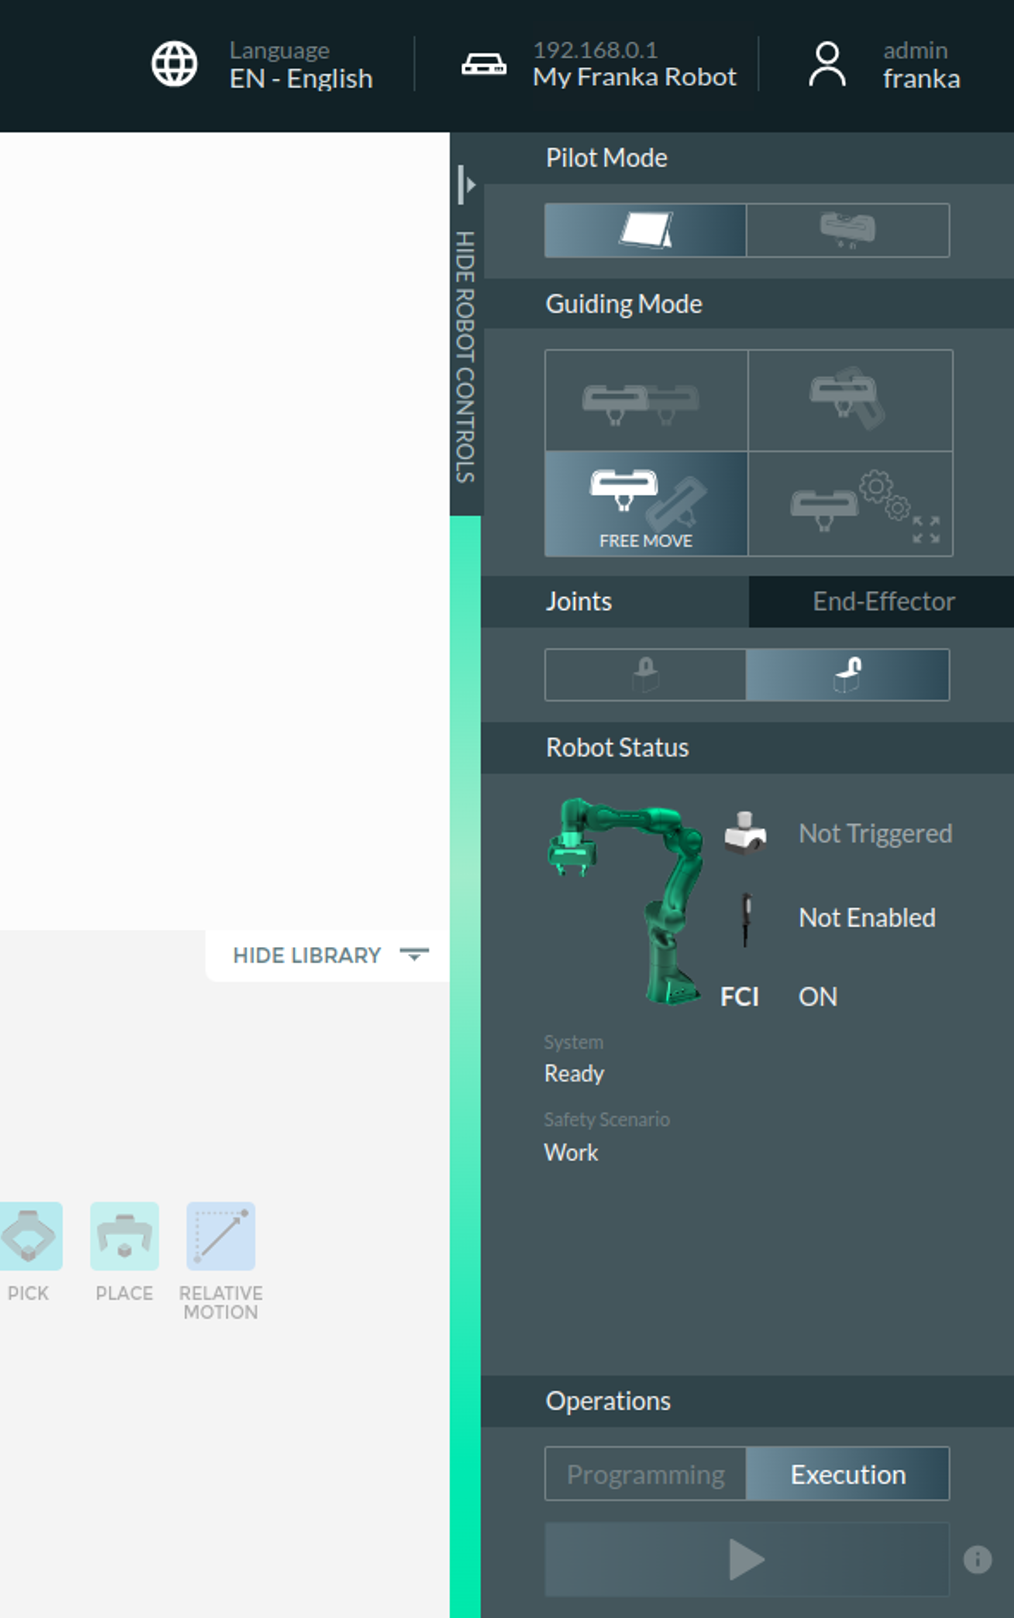
Preparing the robot for FCI usage in Desk
In order to verify the connection, the robot’s brakes need to be unlocked in Desk and the activation device needs to be relased so that the robot is ready for execution indicated by blue LED mode.
Activating the FCI mode
To activate FCI mode, open Desk, then release the robot brakes, and expand the menu in the top bar. Finally, click on ‘Activate FCI’.
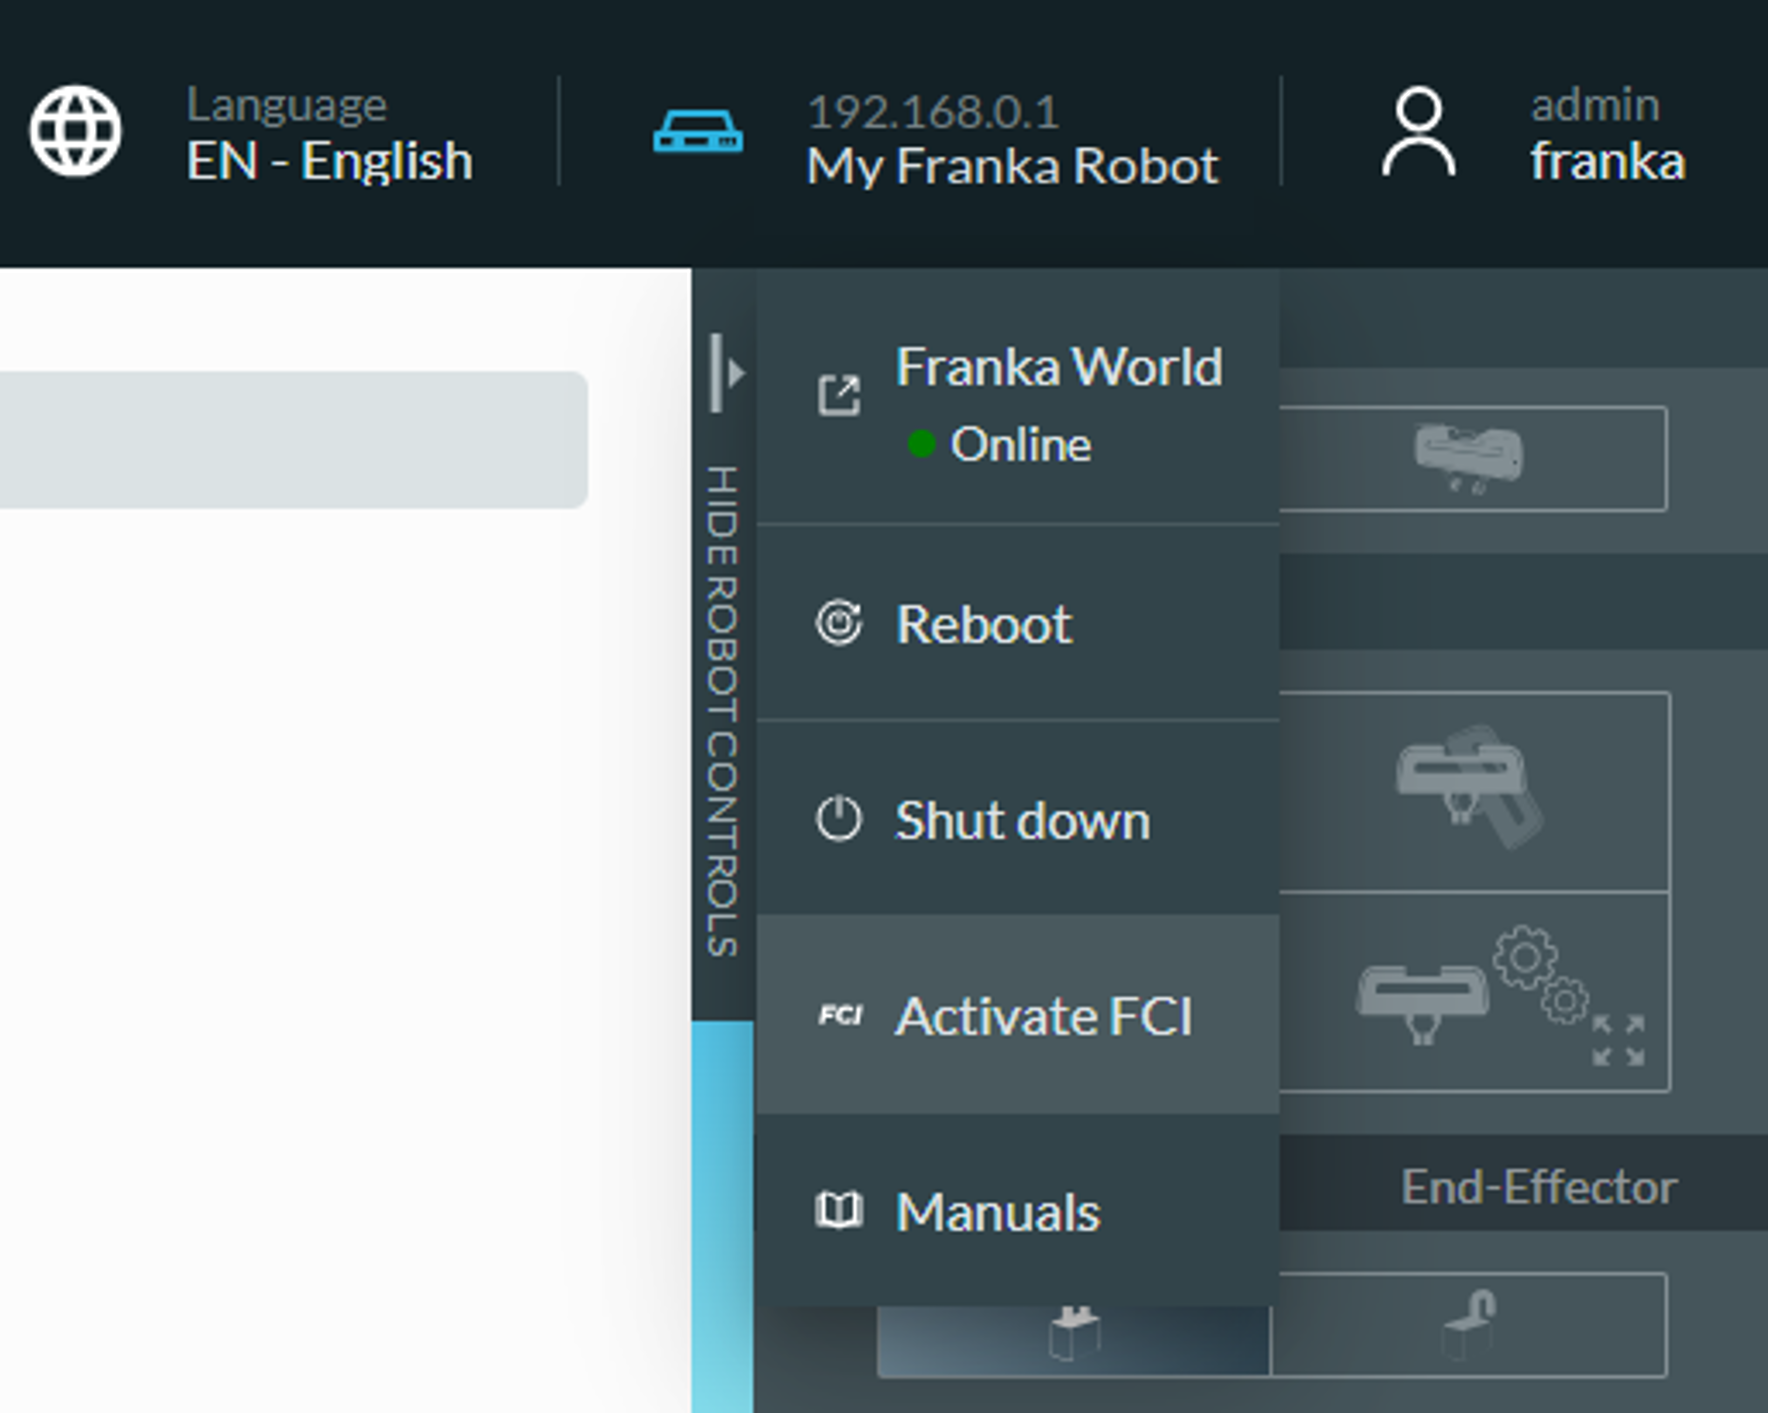
Activating the FCI mode in the Desk topbar menu (system version >= 5.5.0)
FCI mode in Panda
After Activating the FCI mode, a pop-up as shown below is appearing. This pop-up indicates that the FCI mode is currently active and that Desk interactions are not allowed while it is active. This pop-up needs to remain open while working with FCI. Further information about Single Point of Control (SPoC) can be found in the manual shipped with the robot which can also be found in our Franka World Hub.
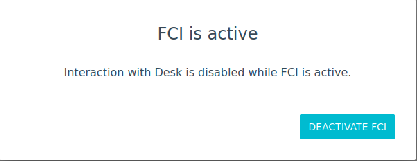
Pop-up when the FCI mode is activated
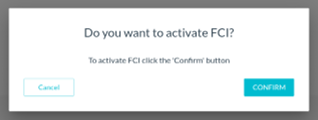
FCI mode in Franka Research 3
After Activating the FCI mode, a pop-up appears, then the user needs to confirm.
 |
 |
Verifying the connection
The previous sections described how to specify the IP address of the Control’s
LAN port. In the following sections that address is referred to as <fci-ip>.
In order to verify that everything is correctly set up, be sure the robot is prepared for FCI
usage in Desk and run the echo_robot_state
example from libfranka. If you decided to install franka_ros and libfranka from the ROS
repository, you can instead read the instructions for
visualizing the robot in ros .
Change to the build directory of libfranka and execute the example:
./examples/echo_robot_state <fci-ip>
The program will print the current state of the robot to the console and terminate after a few iterations. The fields are explained in the RobotState.
Example output:
{
  "O_T_EE": [0.998578,0.0328747,-0.0417381,0,0.0335224,-0.999317,0.0149157,0,-0.04122,-0.016294,
             -0.999017,0,0.305468,-0.00814133,0.483198,1],
  "O_T_EE_d": [0.998582,0.0329548,-0.041575,0,0.0336027,-0.999313,0.0149824,0,-0.0410535,
               -0.0163585,-0.999023,0,0.305444,-0.00810967,0.483251,1],
  "F_T_EE": [0.7071,-0.7071,0,0,0.7071,0.7071,0,0,0,0,1,0,0,0,0.1034,1],
  "EE_T_K": [1,0,0,0,0,1,0,0,0,0,1,0,0,0,0,1],
  "m_ee": 0.73, "F_x_Cee": [-0.01,0,0.03], "I_ee": [0.001,0,0,0,0.0025,0,0,0,0.0017],
  "m_load": 0, "F_x_Cload": [0,0,0], "I_load": [0,0,0,0,0,0,0,0,0],
  "m_total": 0.73, "F_x_Ctotal": [-0.01,0,0.03], "I_total": [0.001,0,0,0,0.0025,0,0,0,0.0017],
  "elbow": [-0.0207622,-1], "elbow_d": [-0.0206678,-1],
  "tau_J": [-0.00359774,-5.08582,0.105732,21.8135,0.63253,2.18121,-0.0481953],
  "tau_J_d": [0,0,0,0,0,0,0],
  "dtau_J": [-54.0161,-18.9808,-64.6899,-64.2609,14.1561,28.5654,-11.1858],
  "q": [0.0167305,-0.762614,-0.0207622,-2.34352,-0.0305686,1.53975,0.753872],
  "dq": [0.00785939,0.00189343,0.00932415,0.0135431,-0.00220327,-0.00492024,0.00213604],
  "q_d": [0.0167347,-0.762775,-0.0206678,-2.34352,-0.0305677,1.53975,0.753862],
  "dq_d": [0,0,0,0,0,0,0],
  "joint_contact": [0,0,0,0,0,0,0], "cartesian_contact": [0,0,0,0,0,0],
  "joint_collision": [0,0,0,0,0,0,0], "cartesian_collision": [0,0,0,0,0,0],
  "tau_ext_hat_filtered": [0.00187271,-0.700316,0.386035,0.0914781,-0.117258,-0.00667777,
                           -0.0252562],
  "O_F_ext_hat_K": [-2.06065,0.45889,-0.150951,-0.482791,-1.39347,0.109695],
  "K_F_ext_hat_K": [-2.03638,-0.529916,0.228266,-0.275938,0.434583,0.0317351],
  "theta": [0.01673,-0.763341,-0.0207471,-2.34041,-0.0304783,1.54006,0.753865],
  "dtheta": [0,0,0,0,0,0,0],
  "current_errors": [], "last_motion_errors": [],
  "control_command_success_rate": 0, "robot_mode": "Idle", "time": 3781435
}
Hint
If an error occurs at this point, perform the ping test and ensure that the robot’s fail-safe safety locking system is opened. Further information are provided in the manual shipped with the robot.